Successfully tackling GE washer repairs often begins with accessing the correct documentation, like owner’s and service manuals – readily available online through GE Appliances.
Understanding GE Washer Models
GE offers a diverse range of washing machine models, from traditional top-load agitator washers to high-efficiency front-load and impeller models. Recognizing your specific model is crucial for accurate repair, as components and procedures vary significantly. The GE Profile series, for instance, often features more advanced technology and requires specialized service manuals – like the 31-9103 – detailing direct drive motor systems.
Older models may have simpler designs, while newer ones incorporate smart features and complex control boards. Identifying the model number, typically found on a label inside the washer lid or on the back, unlocks access to the correct owner’s manual and detailed service information. This ensures you’re using the appropriate parts and following the correct repair steps for your GE washer.
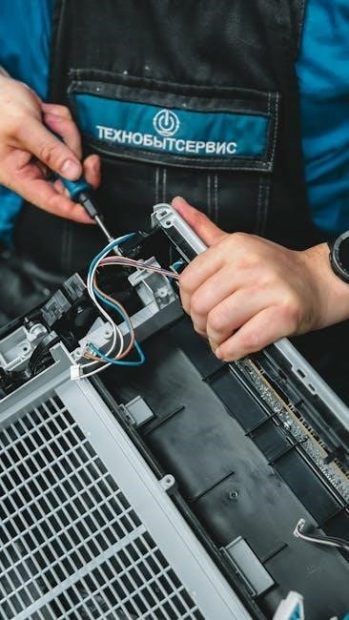
Safety Precautions Before Repair
Prioritizing safety is paramount when undertaking any GE washer repair. Always disconnect the appliance from its power source – unplugging it from the electrical outlet – before beginning any work. Turn off the water supply valves to prevent accidental flooding during component removal or replacement.
Be mindful of sharp edges on the washer’s cabinet and internal parts. Wear appropriate personal protective equipment, including gloves and eye protection. If dealing with electrical components, exercise extreme caution and, if unsure, consult a qualified technician. Remember that water and electricity are a dangerous combination; ensure all areas are dry before re-energizing the appliance. Refer to the owner’s manual for specific safety guidelines related to your GE model.

Common GE Washer Problems & Solutions
Troubleshooting common issues like failure to start, drain, leaks, or excessive noise is often achievable with a GE washer repair manual and basic tools.
Washer Won’t Start
When your GE washer refuses to start, a systematic approach guided by a repair manual is crucial. First, verify the power supply – check the outlet and circuit breaker. A GE service manual (like 31-9103 for Profile washers) details electrical testing procedures. Next, examine the lid switch; a faulty switch prevents operation. The manual provides instructions for testing and replacement.
The control board is another potential culprit. Diagnostics within the service manual will help pinpoint if the board is sending power to the motor. A defective motor or direct drive system, covered extensively in repair guides, could also be the cause. Always disconnect power before any internal inspection, and consult the manual for specific component locations and testing points. Remember, safety first!
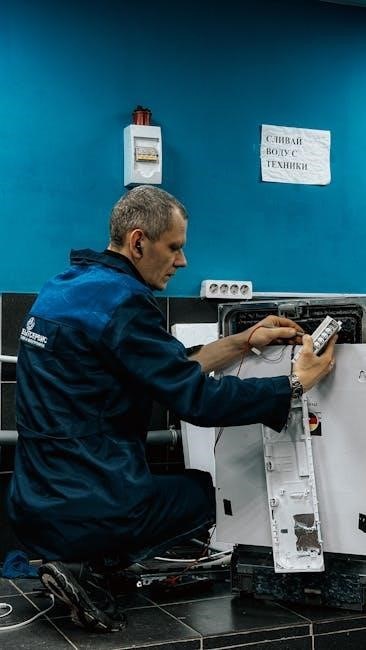
Washer Won’t Drain
A GE washer failing to drain often points to a clogged drain pump or a blocked drain hose – issues a repair manual can help resolve. Begin by checking the drain hose for kinks or obstructions. The service manual (e.g., 31-9103) illustrates hose routing and removal for inspection. If the hose is clear, the drain pump is the likely suspect.
The manual provides detailed steps for accessing and testing the pump for continuity and proper operation. A faulty pump requires replacement. Additionally, examine the pump’s filter for debris. Control board malfunctions can also prevent the pump from activating; the manual’s diagnostic section guides troubleshooting. Always disconnect power before accessing internal components, and refer to the manual for specific component locations.
Washer is Leaking Water
Water leaks in a GE washer can stem from various sources, and a repair manual is crucial for pinpointing the cause. Common culprits include loose hose connections, a damaged door boot seal, or an overfilled tub due to a faulty water inlet valve. The service manual (like 31-9103) details how to inspect and tighten hose clamps and connections.
If the leak originates from the door area, the boot seal likely needs replacement – the manual provides diagrams for removal and installation. An overfilling issue requires checking the water inlet valve’s operation; the manual guides testing for electrical continuity. Inspect the tub for cracks, though this is less common. Always disconnect power before any inspection, and consult the manual for specific component locations and safety procedures.
Washer is Noisy During Operation
Excessive noise during a wash cycle often indicates a mechanical issue within your GE washer, and a service manual is invaluable for diagnosis. Common sources include worn-out suspension rods and springs, a failing motor, or foreign objects lodged within the pump or tub. The GE Profile Washer Service Manual (31-9103) provides detailed instructions for inspecting and replacing the suspension components.
A noisy motor might require testing with a multimeter, as outlined in the manual, to check for proper electrical function. Before disassembly, always disconnect power. The manual’s diagrams help locate and remove the motor for inspection; Check the tub for any trapped items like coins or buttons. Refer to the manual’s troubleshooting section for specific noise patterns and their corresponding solutions.
Accessing GE Washer Repair Manuals
GE Appliances provides readily downloadable owner’s manuals and installation instructions, alongside detailed service manuals like the 31-9103, for efficient repair work.
Locating Owner’s Manuals Online
Finding your GE washer’s owner’s manual online is remarkably straightforward, thanks to GE Appliances’ comprehensive website resources. The GE Appliances website hosts a vast digital library containing copies of Installation Instructions and Owner’s Manuals for both current and numerous older models. This accessibility ensures that assistance is readily available, regardless of your appliance’s age.
Whether you’ve recently purchased a new GE washer or are dealing with an older unit, these manuals provide invaluable information for troubleshooting, understanding features, and performing basic maintenance. Accessing these documents is quick and easy, allowing you to swiftly answer questions and potentially resolve issues without needing professional service. The online availability streamlines the repair process, empowering owners with the knowledge they need.
Downloading Service Manuals (31-9103 Example)
For more in-depth repair information, service manuals like the GE Profile Washer Service Manual (example: 31-9103) are invaluable. These manuals, often available as PDF downloads, provide step-by-step instructions for servicing various washer components. The 31-9103 manual, specifically designed for GE Profile washers with direct drive motors, details procedures like control panel removal and switch diagnostics.
These documents frequently include detailed schematics, parts lists (containing over 200 line items with part numbers and descriptions), and troubleshooting guides. While sometimes requiring a bit of searching online, these service manuals offer a level of detail not found in owner’s manuals, enabling more complex repairs. They are essential for anyone comfortable with appliance disassembly and repair.
Utilizing GE Appliances Website Resources
GE Appliances provides a comprehensive online resource for owners seeking manuals and installation instructions. The GE Appliances website hosts digital copies of documentation for both current and older models, offering quick access to vital information. This is a particularly useful feature when needing to answer questions or diagnose issues with your washing machine.
Whether you have a brand-new appliance or a decades-old unit, you can likely find the relevant literature on their site. These resources can significantly aid in self-diagnosis and repair, potentially saving on service call costs. Utilizing these readily available materials empowers owners to better understand and maintain their GE washers.
Key Components & Their Repair
Servicing GE washers involves understanding components like the motor, control board, water inlet valve, and suspension assembly – detailed in service manuals.
Motor and Direct Drive Systems
GE washers frequently utilize direct drive motors, simplifying the drivetrain by connecting the motor directly to the wash basket. Service manuals, like the 31-9103 GE Profile Washer Service Manual, provide detailed instructions for removing and diagnosing these motors. Troubleshooting often involves checking for continuity and resistance, verifying proper voltage supply, and inspecting the motor brushes (if applicable). Direct drive systems eliminate belts and pulleys, reducing potential failure points, but require specific diagnostic procedures outlined in the service documentation.
Repairing these systems may necessitate replacing the entire motor assembly or, in some cases, individual components like the stator or rotor. The manual guides technicians through the disassembly process, highlighting crucial steps and providing exploded views for accurate reassembly. Always disconnect power before attempting any motor repair, and consult the manual for specific safety precautions related to electrical components.
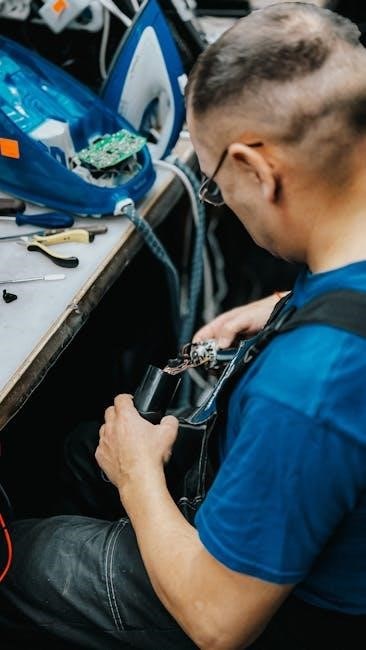
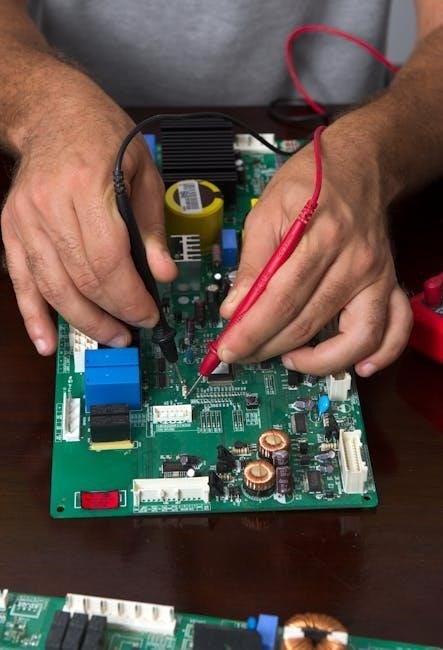
Control Board Diagnostics & Replacement
The electronic control board is the “brain” of a GE washer, and diagnosing issues requires a systematic approach detailed in service manuals like the 31-9103. Initial checks involve visually inspecting the board for burnt components or damaged traces. Further diagnostics often utilize a multimeter to test voltage levels and continuity across various circuits. Error codes displayed on the washer’s interface, if any, provide valuable clues, often cross-referenced within the manual’s troubleshooting guides.
Replacement necessitates disconnecting power and carefully noting the wiring configuration before removal. The service manual provides schematics to aid in correct reconnection. When installing a new control board, ensure it’s the correct model number for compatibility. Proper grounding is crucial to prevent electrical hazards and ensure optimal performance.
Water Inlet Valve Repair
A malfunctioning water inlet valve prevents the washer from filling correctly. Repair often involves accessing the valve, typically located at the back of the machine, as detailed in GE washer service manuals. Before starting, disconnect power and water supply lines. Testing the valve’s solenoid with a multimeter is a crucial diagnostic step, checking for continuity. If the solenoid is faulty, the entire valve usually needs replacement.
The service manual (like 31-9103) illustrates the valve’s connection points. Upon replacement, ensure the new valve’s inlet screens are clean to prevent debris from entering the water system; Securely tighten all connections to avoid leaks, and verify proper operation after restoring water and power.
Suspension Rod and Spring Assembly

The suspension rod and spring assembly is vital for absorbing vibrations during the wash and spin cycles. A GE washer service manual will detail how to access and inspect these components, usually located beneath the washer cabinet. Worn or broken springs and rods cause excessive shaking and noise. Diagnosis involves visually checking for damage – cracks, rust, or detachment.
Replacement requires supporting the washer tub to relieve tension on the assembly. The manual (like 31-9103) provides diagrams for correct placement. Ensure all rods and springs are securely fastened, as improper installation can lead to instability and further damage. GE’s warranty often covers these parts for an extended period.
Warranty Information for GE Washers
GE washers typically include a one-year limited warranty covering parts and labor, with extended coverage—up to five years—for specific components.

One-Year Limited Warranty Coverage
GE’s one-year limited warranty provides comprehensive coverage for your new washing machine, safeguarding against defects in materials or workmanship. This initial period covers any part of the washer that may fail due to such defects. Crucially, GE will not only supply the replacement part, free of charge, but will also shoulder the entire cost of labor and related service expenses required for the repair.
This coverage begins from the original date of purchase, offering peace of mind during the first year of ownership. It ensures that any manufacturing flaws are addressed promptly and professionally, without incurring additional costs for the consumer. Properly registering your appliance is recommended to streamline the warranty claim process should the need arise.
Second to Fifth Year Warranty (Specific Parts)
Beyond the initial one-year coverage, GE extends a limited warranty for specific components from the second through fifth years after the original purchase date. This extended protection specifically applies to the suspension rod and spring assembly, vital for maintaining washer stability, and the main electronic control board, the “brain” of the appliance.
Should either of these parts fail due to a defect in materials or workmanship during this extended period, GE will provide replacement parts free of charge. However, it’s important to note that this extended warranty does not cover labor or related service costs; those remain the responsibility of the owner.

Tools Needed for GE Washer Repair
Essential tools range from basic hand tools like screwdrivers and pliers, to specialized appliance repair equipment for diagnostics and component access.
Essential Hand Tools
A solid foundation of hand tools is crucial for most GE washer repairs. This includes a set of screwdrivers – both Phillips head and flathead – in various sizes to handle different screws within the appliance. Pliers, including needle-nose and standard, are essential for gripping, bending, and manipulating wires and components.
An adjustable wrench is incredibly versatile for loosening and tightening nuts and bolts. A socket set, covering a range of sizes, provides secure fastening and unfastening. Don’t forget a rubber mallet for gently persuading parts without causing damage. A multimeter is vital for electrical testing, checking continuity, and verifying voltage. Finally, having a good set of hex keys (Allen wrenches) is often necessary for accessing internal components. These tools will cover a significant portion of common repair tasks.
Specialty Tools for Appliance Repair
Beyond basic hand tools, certain specialty items significantly aid GE washer repair. A nut driver set, particularly useful for quickly removing fasteners in tight spaces, is highly recommended. Wire strippers/crimpers are essential for safely working with electrical wiring, ensuring secure connections. A clamp meter allows for non-invasive current measurement, aiding in motor diagnostics.
A digital multimeter with auto-ranging capabilities provides accurate voltage, resistance, and continuity readings. A drain pan is invaluable for catching water during disassembly and testing. A parts removal tool kit, often including plastic pry tools, minimizes damage to delicate components. Finally, a shop vacuum helps keep the work area clean and prevents lost parts. Investing in these tools streamlines the repair process and enhances safety.